
From Flat to Fantastic: Adding the Third Dimension
In our previous composition lessons, we explored the Rule of Thirds, framing, leading lines, and perspective. Now, we tackle one of photography’s greatest challenges: making a two-dimensional image feel three-dimensional. Depth and dimension transform snapshots into immersive experiences — they make viewers feel like they could step into your photograph.
Let us explore the techniques that separate flat images from those with breathtaking depth.
1. Why 2D Photos Need to Feel 3D
Photography captures a three-dimensional world on a two-dimensional surface. Without depth cues, images feel flat, lifeless, and unengaging. Depth creates:
- Immersion: Viewers feel “in” the scene
- Storytelling: Layers tell stories from foreground to background
- Professional quality: Depth separates amateur snapshots from professional work
- Emotional impact: Depth adds mood and atmosphere
Think of your favorite landscape photograph — chances are it has incredible depth that draws you in.
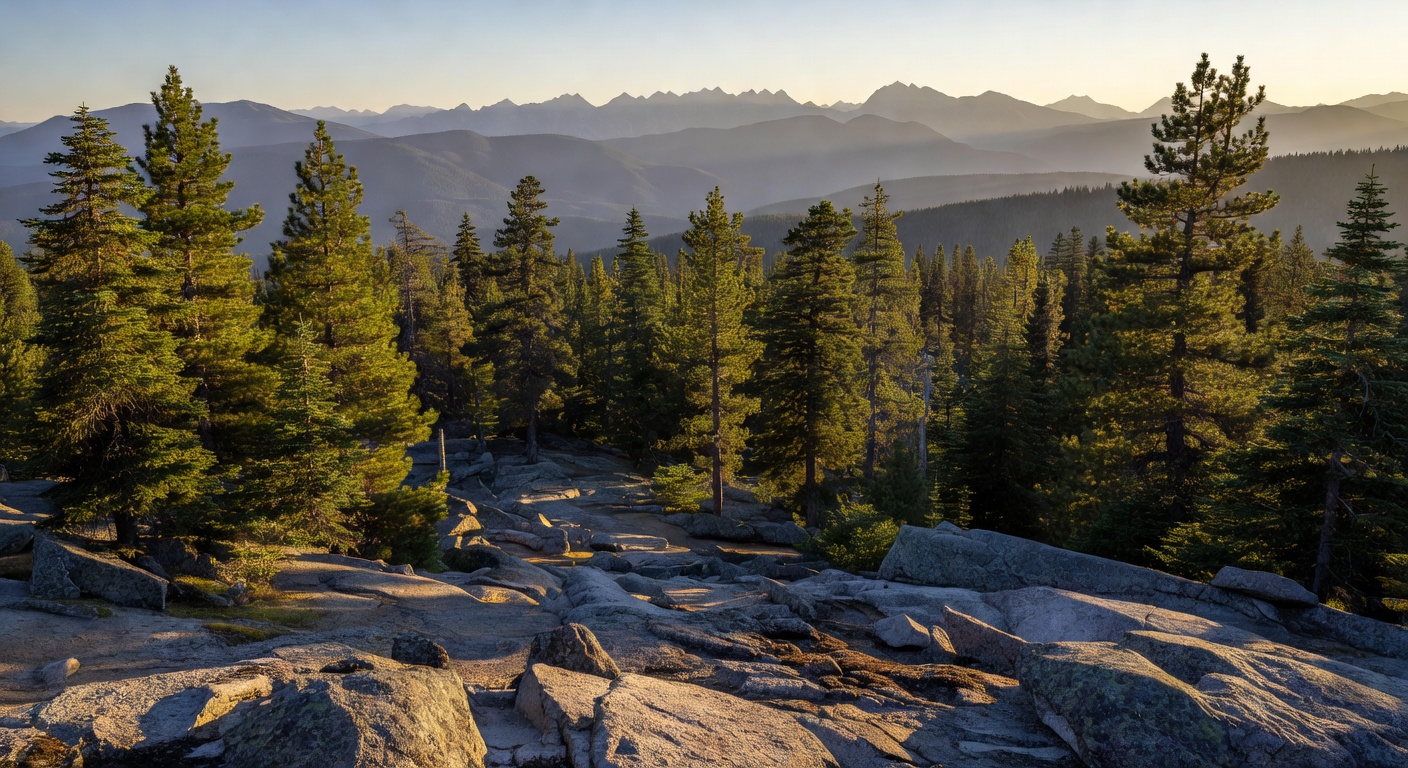
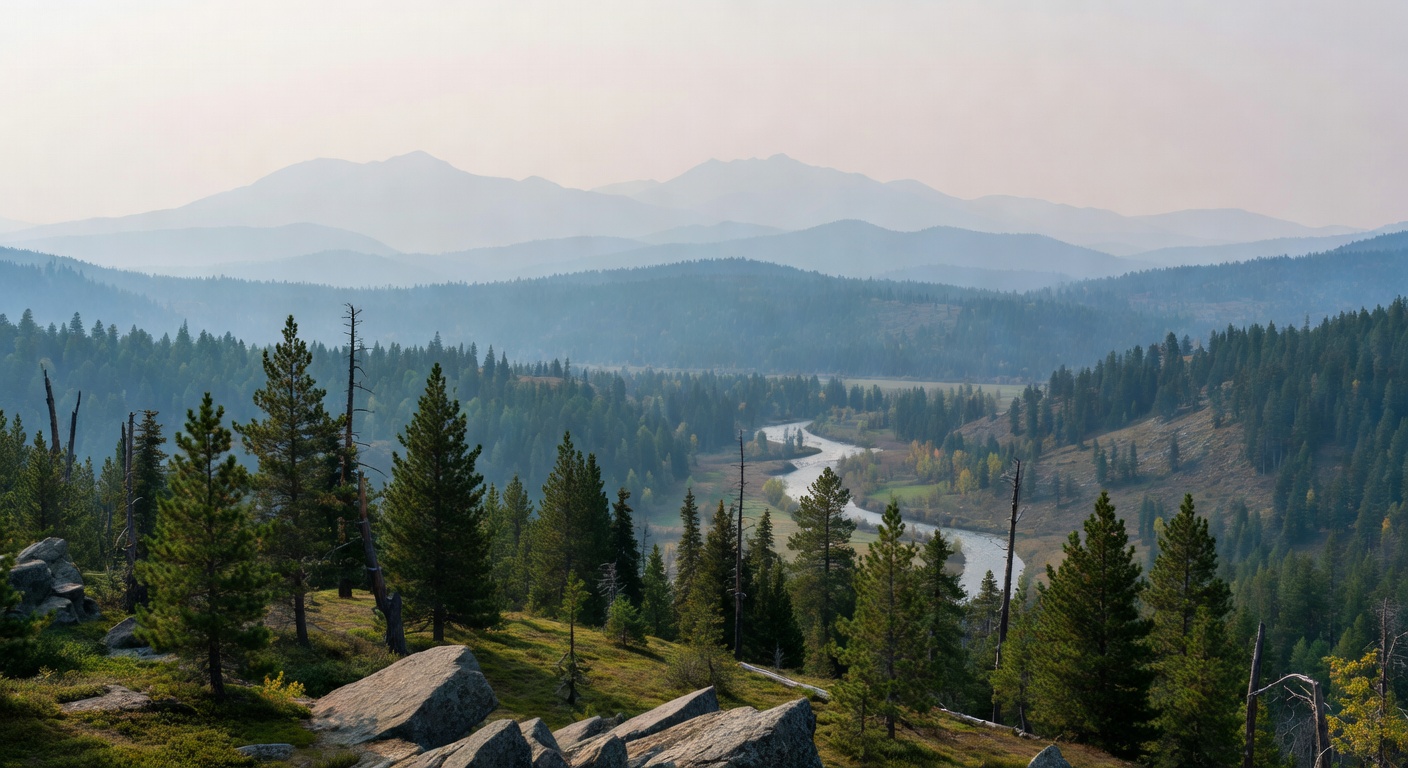
2. Foreground, Middle Ground, Background Layering
The most fundamental depth technique: creating distinct layers.
Foreground
The closest layer to the camera. Provides entry point for the viewer’s eye.
Elements: Rocks, flowers, branches, people, architectural details
Purpose: Creates immediate interest, adds scale, frames the scene
Middle Ground
The main subject area. Where the story happens.
Elements: Main subject, buildings, trees, people engaged in action
Purpose: Holds viewer’s attention, contains primary narrative
Background
The farthest layer. Provides context and atmosphere.
Elements: Distant mountains, sky, horizon, city skylines
Purpose: Sets the scene, adds mood, completes the story
How to Create Effective Layers
- Position yourself: Move to include elements at different distances
- Use wide-angle lenses: Exaggerate foreground-background relationships
- Control focus: Use aperture to keep all layers sharp or selectively blur
- Align with Rule of Thirds: Place layers on different thirds lines
3. Atmospheric Perspective (Aerial Perspective)
A natural phenomenon where distant objects appear:
- Lighter in tone (less contrast)
- Bluer in color (shift toward blue)
- Softer in detail (less sharp)
This occurs because light scatters as it passes through atmosphere (dust, moisture, pollution).
How to Use Atmospheric Perspective
- Shoot in hazy conditions: Mist, fog, pollution enhance the effect
- Use telephoto lenses: Compress layers, emphasizing atmospheric effects
- Post-processing: Add subtle haze to distant objects in editing
- Color grading: Shift distant objects toward blue, foreground toward warm
4. Depth of Field Control
One of the most powerful tools for creating depth: controlling what is in focus.
Shallow Depth of Field
Only a thin slice is sharp; everything else blurs.
How: Wide aperture (f/1.4-f/2.8), close subject distance, long focal length
Effect: Isolates subject, separates from background, creates “bokeh”

Deep Depth of Field
Everything from foreground to background is sharp.
How: Narrow aperture (f/11-f/22), wide-angle lens, distant subject
Effect: Emphasizes layers, shows entire scene in detail
Selective Focus
Focus on one layer, let others blur. Directs attention precisely.
Example: Sharp foreground flower, blurry middle ground trees, soft background mountains
5. Overlap and Scale
Psychological cues that create depth perception.
Overlap
When one object partially covers another, our brain interprets the covered object as farther away.
How to use:
- Position elements to overlap naturally
- Create “peekaboo” effects
- Use overlap to guide the eye through layers
Scale
Familiar objects provide size reference, creating depth through comparison.
How to use:
- Include people for scale in landscapes
- Use known objects (cars, buildings, trees)
- Place small objects in foreground, large in distance
6. Light and Shadow for Depth
Light sculpts form; shadows define depth.
Side Lighting
Light from the side creates long shadows that reveal texture and form.
Best time: Golden hour (sun low in sky)
Effect: Dramatic, three-dimensional feel
Back Lighting
Light from behind subjects creates silhouettes and rim light.
Effect: Separates subjects from background, creates depth through contrast
Front Lighting
Light from camera position. Flattens subjects — use sparingly for depth.
Shadows as Depth Cues
Long shadows recede into distance, creating perspective lines.
7. Practical Exercises
Exercise 1: The Three-Layer Challenge (45 minutes)
Find a scene with clear foreground, middle ground, background. Shoot it with:
- Deep DoF (f/16) — all layers sharp
- Shallow DoF (f/2.8) — focus on each layer separately
- From high and low angles
Exercise 2: Atmospheric Perspective Hunt (1 hour)
On a hazy day, find a vista with distant elements. Shoot with telephoto lens. Notice how color and contrast change with distance.
Exercise 3: Overlap Expedition (30 minutes)
Find 10 examples of overlap in your environment. Photograph each, noting how overlap creates depth.
Exercise 4: Scale Story (1 hour)
Include a person in 5 different landscape shots. Vary their position (foreground, middle, background). Notice how scale affects depth perception.
Exercise 5: Light Direction Study (Multiple sessions)
Photograph the same subject at different times of day. Compare side, back, and front lighting for depth.
8. Common Mistakes and How to Fix Them
Mistake 1: Centered, Empty Foreground
Problem: Subject floats in middle with nothing in front.
Fix: Crouch to include foreground elements; use framing techniques.
Mistake 2: Flat Midday Light
Problem: Harsh overhead light eliminates shadows.
Fix: Shoot during golden hour or use reflectors to create shadow contrast.
Mistake 3: No Overlap/Scale
Problem: Elements appear stacked like cardboard cutouts.
Fix: Step closer to foreground; include reference objects for scale.
Mistake 4: Overly Sharp Everywhere
Problem: No depth variation through focus.
Fix: Use aperture creatively; prioritize sharpness on key layers.
Mistake 5: Busy Backgrounds
Problem: Background competes with subject.
Fix: Use shallow DoF or reposition to simplify background.
Mistake 6: Vertical Ignorance
Problem: Always shooting horizontal for landscapes.
Fix: Try vertical orientation for tall subjects (trees, waterfalls, buildings).
Conclusion: Your Depth Mastery Journey
Creating depth is the culmination of everything we have learned: composition, framing, perspective, and now, layering. When you combine these techniques, your photographs transform from flat records to immersive experiences.
Remember: depth is not a single technique but a combination of many. Start by consciously looking for layers in every scene. Train your eye to see foreground opportunities, middle ground subjects, and background context.
In our next lesson, we will explore lighting — both natural and artificial. Understanding light is the final piece that brings all these composition techniques together, allowing you to create photographs with mood, dimension, and professional polish.
Your assignment: Create one image that uses at least three depth techniques discussed here. Share it and explain your choices.