Take Control: Artificial Lighting for Professional Results
In our previous lessons, we mastered natural light — golden hour, window light, reflectors. Now, we explore artificial lighting: flash, strobes, and studio setups. This is where photography becomes a controlled art form. Learn these techniques, and you can create stunning images anywhere, anytime.
Artificial light gives you complete control over quality, direction, and color — turning average spaces into professional studios.
1. Flash Basics
On-Camera Flash
Built-in or hotshoe-mounted flash directly above lens.
Characteristics:
- Convenient, always available
- Direct light = harsh shadows
- Limited power
- Red-eye common

Bounce Flash
Point flash at ceiling/wall to bounce light.
Characteristics:
- Much softer light
- Large light source (ceiling)
- Warmer light (from ceiling color)
- Reduced power (light loss)
Pro tip: White ceiling = best bounce surface. Colored walls tint light.
Off-Camera Flash (OCF)
Flash positioned away from camera.
Advantages:
- Control direction and angle
- Natural catchlights
- Professional quality
2. Flash Power Control
TTL (Through The Lens)
Camera meters scene and adjusts flash power automatically.
Pros:
- Fast, convenient
- Works in changing light
- High-speed sync (HSS) capable
Cons:
- Inconsistent between shots
- Less creative control
Manual Flash
You set exact power (1/1, 1/2, 1/4, 1/8, etc.).
Pros:
- Consistent exposure
- Full creative control
- Predictable results
Cons:
- Requires testing
- Slower workflow
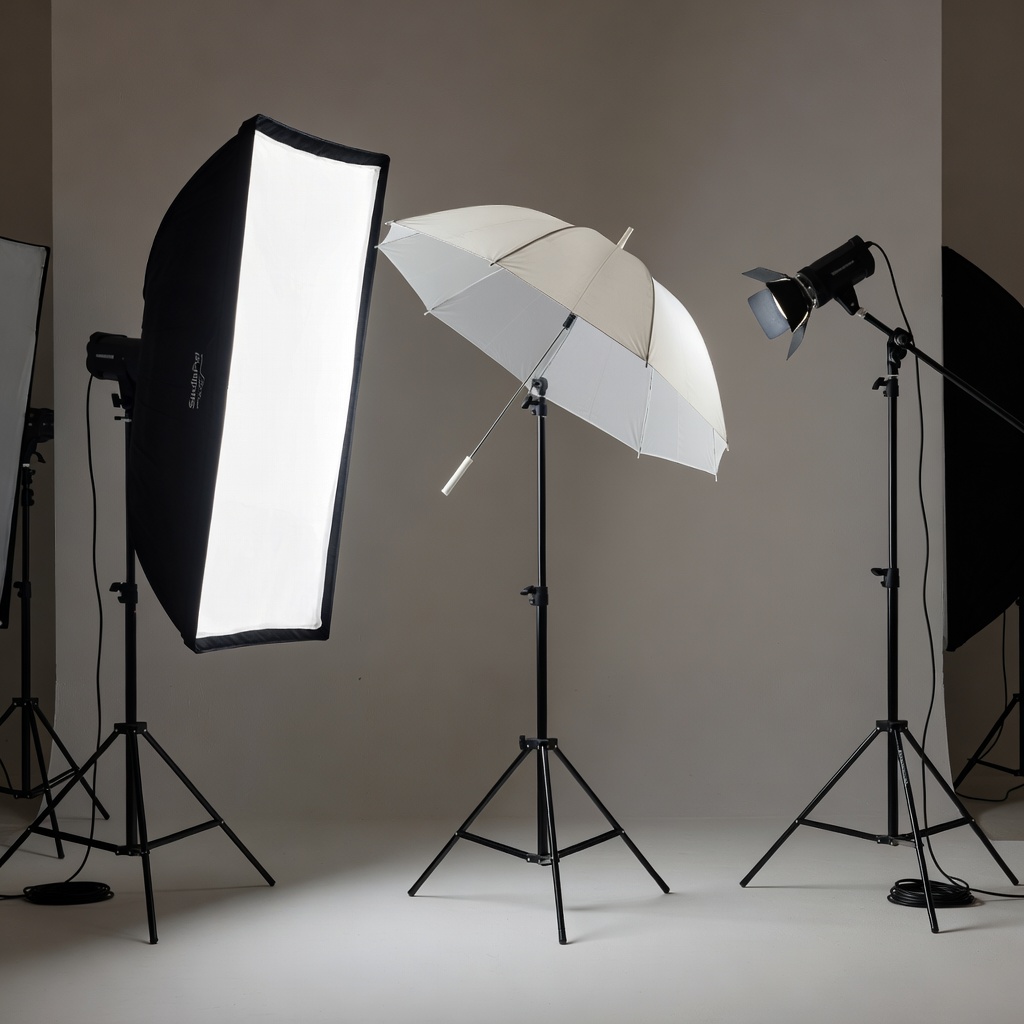
3. Flash Modifiers
Softboxes
Large fabric boxes that diffuse light.
Effect: Beautiful soft light, perfect for portraits.

Umbrellas
Shoot-through (light passes through) or reflective (bounces back).
Effect: Soft, broad light. Cheaper than softboxes.
Grids/Honeycombs
Narrow the light beam.
Effect: Precise control, prevents light spill.
Gels
Colored filters for flash.
Effect: Match ambient light, creative color effects.
4. Studio Lighting Setups
One-Light Setup
Single key light.
Position: 45° angle, slightly above eye level.
Effect: Dramatic, simple, beginner-friendly.
Two-Light Setup (Key + Fill)
Add fill light opposite key.
Ratio: Key 2x brighter than fill (3:1 ratio).
Effect: More even lighting, reduced shadows.

Three-Point Lighting (Key + Fill + Rim)
Add rim light behind subject.
Effect: Professional separation, modeling, dimension.
Background Light
Separate light for background.
Effect: Colorful or graduated backgrounds.
5. Triggering Systems
Optical Slaves
Flash fires when it sees camera flash.
Pros: Cheap
Cons: Line of sight, ambient flash interference
Radio Triggers
Wireless radio signals.
Pros: Reliable, 360° range
Cons: More expensive
Camera Hot Shoe + Cables
Wired connection.
Pros: Reliable
Cons: Limited distance
6. Budget Studio Setup
Professional results without professional prices.
Essential Gear ($200-300)
- 2x Speedlights: Used Godox V1 ($150 each)
- Radio triggers: Godox XPro ($70)
- Light stands: 2x Neewer ($20 each)
- Modifiers: 24″ umbrella ($20), softbox ($40)
- Reflectors: 5-in-1 ($25)
Home Studio Setup
Space: Garage corner, spare room, 10x10ft minimum.
Background: White seamless paper ($40).
Total cost: ~$280.
7. Practical Exercises
Exercise 1: On-Camera Flash Progression
Portrait subject:
- Direct flash (harsh)
- Bounce flash (improved)
- Off-camera side (professional)
Exercise 2: TTL vs Manual Comparison
Same setup, 5 shots:
- TTL default
- TTL -1EV
- Manual match
Exercise 3: Modifier Matrix
Same face:
- Bare flash
- Softbox
- Umbrella
- Rim light + grid
Exercise 4: Three-Point Build
Build lighting step-by-step:
- Key only
- +Fill (3:1 ratio)
- +Rim light
- +Background color
Exercise 5: Budget Studio Challenge
Full setup. Shoot model, product, group portrait. Iterate ratios.
Conclusion: Lighting Mastery Achieved
You now have complete control over light — natural and artificial. From bounce flash tricks to studio three-point perfection, you can create professional results anywhere.
Your assignment: Create a three-point lighting portrait using whatever flash you have (even smartphone LED). Share your before/after.
In our next lesson, we will explore editing and post-processing — taking your perfectly-lit images and elevating them to final masterpieces.